Burning the CD
CD Burning Software
Before you can use WISP, you need to have a copy of it on some kind of bootable medium. The most convenient and common method to make a copy is to obtain an .iso from the download page and burn it to a CD. If you have not yet downloaded the WISP CD image file, you will need to do so now.
To create the WISP CD, you will also need at least one blank writable disc (such as a CD-R) and CD burning software. Many off-the-shelf computers come with preinstalled CD burning software; common names include Nero Burning ROM and Roxio Easy CD Creator. If you have one of those programs installed and wish to use it, please consult the program's manual, the software company's website, or other resources to determine how to burn the WISP CD image. Once you have done so, please move on to the next step in the instructions by clicking here.
If you do not want to use one of those programs or do not have any installed, you can obtain and install a free program called InfraRecorder. The InfraRecorder website can be found here.
Using InfraRecorder
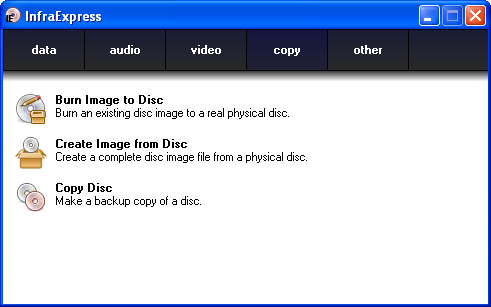
Once you have downloaded and installed InfraRecorder, you can use it to burn the WISP CD image. Start by launching InfraExpress (which, by default, is found in the Start menu under Programs > InfraRecorder) and, from the menu at the top of the screen, choose the "copy" option.
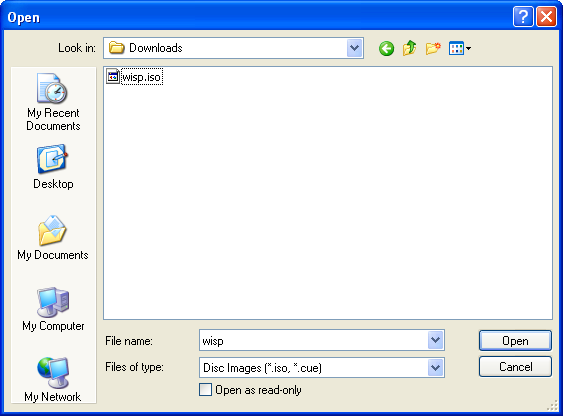
Click on the icon labeled "Burn Image to Disc" and InfraRecorder will open a file chooser. Navigate to the place where you saved the WISP CD image and select it.
InfraRecorder may ask you whether or not you want to write the image to DVD media; if it does, answer appropriately for the type of blank disc you are using.
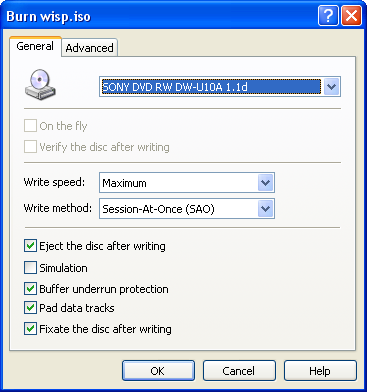
The image writing dialog should now appear. The default settings should be fine, so click OK to make InfraRecorder burn the WISP CD image.
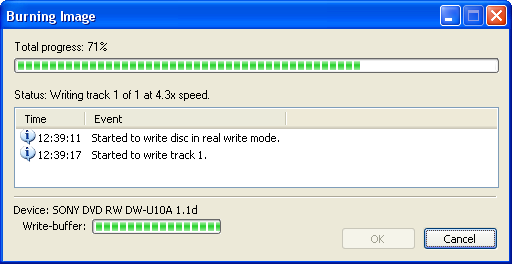
InfraRecorder will now display the burning progress dialog; it will look similar to the one pictured below.
Once InfraRecorder has finished, it will eject the CD. Press OK to dismiss the CD burning dialog and label the CD appropriately. You are now ready to move on to the next step: Booting the WISP CD.
Content copyright Zachary Palmer 2007. All rights reserved.
This page is ad-free. If you see an advertisement on this page, please contact me at zep01@bahj.com.


